
Blog
What Is Tile Bond Adhesive and How Does It Work?
Tile Bond Adhesive is the quiet force beneath many durable tile surfaces. It connects tile to concrete, cement board, plaster, or another prepared substrate. Without it, even attractive tiles may sound hollow, shift, or crack under daily pressure.
The material works through adhesion, curing, and mechanical contact. Cement-based formulas develop strength as water reacts with cement particles. Polymer-modified products add flexibility and improved grip. Some ready-mixed adhesives depend on moisture evaporation before they fully harden. The correct choice depends on tile size, surface condition, moisture exposure, and installation location.
Tile educator and industry expert Michael Byrne has emphasized, “The substrate is the key to a successful tile installation.” That principle remains practical. Dust, paint, oil, or weak concrete can interrupt the bond. A clean surface matters. Trowel ridges also need consistent height, so the adhesive spreads beneath the tile instead of leaving empty pockets. Large tiles require careful coverage checks, especially near corners and edges.
Real projects are rarely perfect. A wall may look flat but contain subtle dips. The adhesive may seem workable, yet its open time can pass quickly in warm, dry air. These details are easy to underestimate. They deserve attention.
This guide explains what Tile Bond Adhesive contains, how bonding develops, and why preparation controls performance. It also examines common failures, curing conditions, and practical selection methods. No adhesive can repair every substrate problem. That limitation is important. Good results begin before the trowel touches the surface.
Definition and Purpose of Tile Bond Adhesive
What Is Tile Bond Adhesive and How Does It Work?
Tile bond adhesive is a prepared material that attaches tiles to a firm surface. Its purpose is simple: create a stable connection between the tile and the substrate. It also helps distribute pressure across the tile’s back. Common formulas contain cement, polymers, or resin-based ingredients. Each type suits different surfaces, moisture levels, and tile materials.
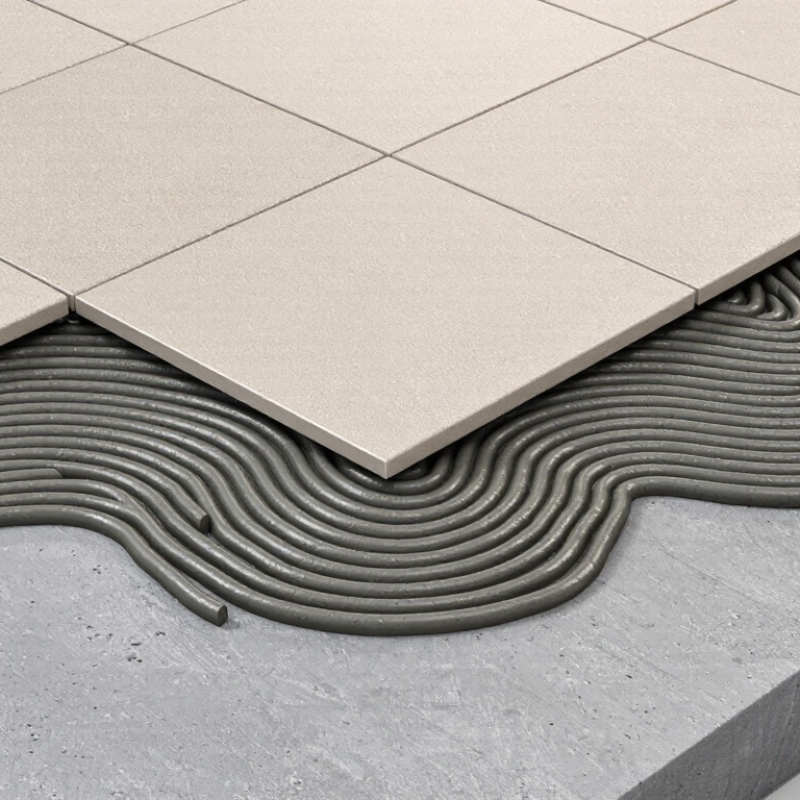
The adhesive works through contact and curing. A notched trowel creates ridges, allowing the tile to press into an even bed. As the adhesive dries or chemically cures, it grips tiny surface irregularities. The result should resist sliding, cracking, and everyday movement. However, it cannot correct a weak, dusty, or uneven substrate. That mistake is easy to miss. Experienced installers usually inspect the surface first, remove loose particles, and check whether moisture may interfere with bonding.
Tips: Follow the product’s technical instructions carefully. Spread only a manageable area, especially in a warm room. Press and slightly twist each tile for better contact. Lift one tile occasionally and inspect its back. Coverage should look consistent, not patchy. Allow proper curing time before grouting or heavy use. Rushing often causes avoidable failures. A small test area can reveal problems early, although it is not a complete substitute for professional assessment.
Key Ingredients and Properties of Tile Bond Adhesive
What Is Tile Bond Adhesive and How Does It Work?
Key Ingredients and Properties of Tile Bond Adhesive
Tile bond adhesive is a cement-based or polymer-based material that locks tiles onto floors and walls. Its main ingredients usually include cement, graded silica sand, water-retention agents, and polymer powders. Cement creates hardness. Polymers improve flexibility and adhesion. Some formulas also contain cellulose ethers, which control water movement and workability.
The ISO 13007 standard classifies cementitious adhesives as C1 or C2. C2 products provide improved performance, especially under moisture and movement. The same standard identifies reduced-slip adhesives as T and extended-open-time products as E. ANSI A118.4 testing also measures bond strength after curing, helping installers compare performance rather than relying only on packaging claims. In real projects, substrate movement remains a common failure cause. Even strong adhesive can crack over dusty concrete or poorly prepared drywall. That part is easy to underestimate.
Tips: Check the tile size, substrate, moisture level, and indoor or outdoor exposure. Follow the manufacturer’s mixing ratio precisely. A 2024 industry market analysis reported continued growth in polymer-modified tile adhesives, reflecting demand for better flexibility and faster installation. Still, jobsite testing matters. Mix a small batch first, observe the open time, and lift one tile to check coverage. Perfect coverage is not always achieved on the first attempt.
How Tile Bond Adhesive Creates a Durable Bond
Tile bond adhesive creates durability through both chemical curing and physical interlock. Cement-based adhesive hydrates after mixing, forming a hardened matrix around the tile’s underside. Its ridges press into small surface irregularities, while polymers improve flexibility and adhesion. The result is stronger than simple surface contact.
Preparation controls much of that bond. The Tile Council of North America’s 2024 U.S. Market Report recorded roughly 3.1 billion square feet of tile consumption in 2023. That volume makes installation quality especially important. The TCNA Handbook recommends about 95% adhesive coverage in wet areas. A clean, stable substrate matters. Dust, grease, and weak paint can act like release agents.
Spread adhesive with the correct notched trowel, then press the tile across the ridges. This collapses air pockets and increases contact. Large tiles may need adhesive on their backs, too. ANSI A118.4 performance requirements also address bond strength and water exposure for modified cementitious mortars. Still, the weak point is often human error. I have seen excellent adhesive fail over damp concrete or uneven walls. Waiting for the substrate to dry and checking coverage can feel slow. It is not wasted time. Temperature, tile porosity, curing time, and movement joints also affect long-term performance. A bond may look firm today, yet fail months later when moisture and thermal movement find a neglected gap.
What Is Tile Bond Adhesive and How Does It Work? - How Tile Bond Adhesive Creates a Durable Bond
| Data Dimension | Typical Information | How It Supports a Durable Bond |
|---|---|---|
| Definition | Tile bond adhesive is a prepared bonding material used to attach ceramic, porcelain, glass, stone, and other tiles to a suitable substrate. | It forms a continuous bond layer that transfers load between the tile and the surface below. |
| Common Adhesive Families | Cement-based thin-set mortar, ready-mixed organic adhesive, and reactive resin adhesive such as epoxy-based systems. | Different chemistries provide different levels of flexibility, moisture resistance, chemical resistance, and working time. |
| Primary Ingredients | Cementitious products generally contain cement, graded mineral fillers, water-retention agents, and polymer modifiers. Premixed products use organic binders, fillers, and additives. | Fillers control body and coverage, while binders and modifiers improve adhesion, workability, water retention, and flexibility. |
| Bonding Mechanism | The adhesive keys into surface irregularities and develops adhesion through mechanical interlock, physical adhesion, and chemical or polymer-related interactions. | Multiple bonding mechanisms help resist shear, tension, vibration, and small movements at the tile interface. |
| Cement-Based Curing | Cement-based adhesive hardens mainly through hydration, a chemical reaction between cement compounds and water. Drying also influences moisture loss in some formulations. | Hydration creates a hardened mineral matrix that locks the tile to the substrate. |
| Polymer-Modified Performance | Polymer additives can improve flexibility, wet adhesion, deformability, water retention, and resistance to cracking or shrinkage. | The modified adhesive can better accommodate minor substrate movement and thermal expansion. |
| Recommended Substrates | Common substrates include sound concrete, cement mortar beds, cement backer boards, masonry, and properly prepared gypsum-based boards where permitted. | Compatible, clean, stable, and properly prepared substrates reduce bond failure caused by dust, movement, or contamination. |
| Surface Preparation | The surface should be structurally sound, clean, dry or appropriately damp, and free from dust, grease, curing compounds, loose paint, and weak material. | Good preparation maximizes contact and prevents contaminants from acting as a bond-breaker. |
| Application Method | The adhesive is usually spread with a notched trowel. The tile is pressed and moved slightly into place to collapse ridges and improve contact. | Uniform coverage reduces voids, weak spots, and localized stress beneath the tile. |
| Open Time | Open time is the period during which tiles can be placed into the applied adhesive. It varies with product formulation, temperature, humidity, airflow, and substrate porosity. | Placing tiles before surface skinning occurs helps maintain effective wet contact and adhesion. |
| Coverage and Contact | Coverage requirements depend on tile size, substrate flatness, trowel profile, and installation exposure. Larger tiles and wet areas generally require particularly high contact. | Higher contact minimizes unsupported areas where impact, water, or thermal stress could cause cracking or debonding. |
| Moisture Resistance | Some adhesives are suitable for damp or wet locations, but adhesive selection must match the exposure and the complete waterproofing system. | Moisture-compatible formulations help retain bond strength when exposed to periodic or continuous humidity. |
| Flexibility and Movement | Flexible or deformable adhesives are used where thermal changes, vibration, or limited substrate movement may occur. | Controlled flexibility helps dissipate movement-related stress instead of transferring all of it to the tile or bond line. |
| Temperature Considerations | High or low temperatures can change working time, curing rate, viscosity, and final performance. Installation conditions should remain within the product specification. | Correct temperature control supports consistent curing and limits thermal stress during installation. |
| Main Causes of Bond Failure | Typical causes include contaminated or moving substrates, insufficient adhesive coverage, excessive skinning, incorrect mixing, premature loading, incompatible materials, and unsuitable environmental conditions. | Following the adhesive’s technical instructions and the applicable tile-installation standard helps prevent premature debonding and cracking. |
Note: Exact working times, coverage, curing periods, water resistance, and performance classifications vary by formulation and installation conditions. Always follow the current technical data sheet and applicable local installation requirements.
Choosing the Right Adhesive for Different Tile Materials
Tile bond adhesive is the engineered layer between a tile and its substrate.
It transfers loads, fills small surface irregularities, and accommodates limited movement. Cement-based adhesives need water for hydration. Polymer-modified versions also improve flexibility and bond strength. Ready-mixed adhesives rely on drying, so they may perform poorly beneath large, dense tiles.
Material choice changes the adhesive requirement.
Ceramic tiles usually accept standard cementitious adhesive on stable indoor walls. Porcelain absorbs little water, so a polymer-modified adhesive with stronger mechanical grip is safer. Glass tiles need a smooth, white adhesive to prevent visible shadows. Natural stone requires careful moisture control, especially with light-colored or porous stone. Large-format tiles demand extended open time and excellent coverage.
Not optional.
Grand View Research estimates the global tile adhesive market reached about USD 3.6 billion in 2023, with continued growth expected through 2030.
Its analysis links demand to renovation and larger tile formats. The Tile Council of North America recommends selecting mortars through performance standards, including ANSI A118.4 for improved cementitious mortar. ISO 13007 also classifies adhesives by adhesion, slip, and open-time performance. These numbers and standards help, but they do not replace a site test.
I have seen excellent adhesive fail over dusty concrete. A clean substrate matters.
Technicians should check moisture, flatness, tile weight, and exposure before choosing the product. Even a technically correct adhesive can fail when coverage is incomplete or curing conditions are ignored.
Application Steps for Installing Tiles with Bond Adhesive
Tile bond adhesive is a prepared bonding material that fixes tiles to walls or floors. It creates a firm layer between the tile and a clean, stable surface. Some formulas contain cement, polymers, or both. The correct choice depends on tile weight, surface type, moisture, and indoor or outdoor use.
Before installation, remove dust, grease, loose paint, and old adhesive. Repair cracks and allow damp areas to dry. Measure the surface carefully, then mark a practical layout. Mix powdered adhesive with clean water according to the manufacturer’s instructions. Let it rest briefly, then mix it again. Do not add extra water. That weakens the bond.
Spread the adhesive with a notched trowel across a small working area. Hold the trowel at a consistent angle, creating even ridges. Press each tile firmly and slide it slightly to collapse the ridges. Check coverage by lifting an occasional tile. Large tiles may need adhesive on their backs too. Keep joints even with spacers, and remove squeezed-out adhesive before it hardens. Do not rush.
Allow the adhesive to cure for the stated time before walking on the floor or filling joints. Temperature and humidity can change this period. I have seen neat-looking installations fail because the surface was dusty underneath. That mistake is easy to miss. Check alignment, coverage, and tile movement before the adhesive sets. If a tile shifts, remove it, clean the area, and reset it with fresh adhesive.
