
Blog
How to Choose the Right Automotive Camera for Your Vehicle?
Choosing the right Automotive Camera is no longer a simple matter of selecting the highest resolution. Vehicle safety depends on field of view, low-light performance, image processing, weather resistance, and software compatibility. A camera that performs well in a clean showroom may struggle with rain-covered lenses, glare, dust, or a dark parking garage. Real roads are less forgiving.
Industry data shows why this decision matters. Yole Intelligence’s automotive imaging research has reported continued growth in camera content per vehicle, driven by advanced driver-assistance systems and surround-view functions. The U.S. National Highway Traffic Safety Administration also requires rear visibility systems to display a defined area behind passenger vehicles. These requirements raise the standard beyond basic reversing assistance. They also expose a common mistake: treating every camera as interchangeable.
Mobileye CEO Amnon Shashua has stated, “The camera is the most important sensor for autonomous driving.” His view highlights the camera’s central role in recognizing lanes, vehicles, pedestrians, and traffic signs. However, one sensor cannot solve every driving condition. Radar, lidar, ultrasonic sensors, and careful calibration may still be necessary. The best choice depends on your vehicle type, mounting position, operating climate, and intended function. Check the details. A 120-degree lens may cover a driveway well, but it can distort distant objects. A higher-resolution model may produce better images, yet demand stronger processing hardware. This guide examines the practical trade-offs, including performance, installation, reliability, and cost, so buyers can choose with clearer expectations rather than marketing promises.
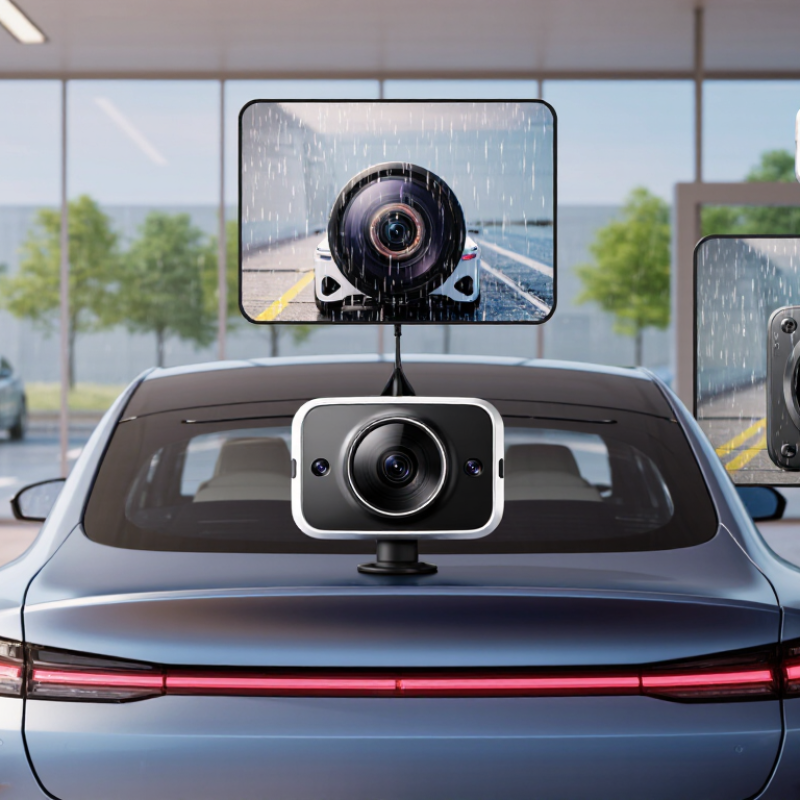
Define Your Vehicle’s Camera Needs and Driving Scenarios
How to Choose the Right Automotive Camera for Your Vehicle?
Define your vehicle’s camera needs before comparing specifications. A city car may need a wide rear camera for tight parking spaces. A delivery van needs stronger side coverage and clear visibility near blind zones. An off-road vehicle may require sealed cameras, low-light performance, and a wider viewing angle. The driving scene matters more than pixel count.
Start with real conditions. Do you drive mostly at night, in rain, or on unmarked roads? A camera with high dynamic range can balance bright headlights and dark surroundings. Low-latency video also matters when reversing beside a child, bicycle, or narrow wall. According to the World Health Organization’s Global Status Report on Road Safety 2023, about 1.19 million people die in road crashes each year. A camera cannot prevent every collision. It can improve awareness.
Check the image at dawn, not only in a showroom. A specification can still mislead. In a field evaluation, inspect glare, water drops, lens distortion, and screen response. The Insurance Institute for Highway Safety reported that rearview cameras were associated with a 17% reduction in backing crashes in one study. However, drivers still need mirrors and direct observation. Choose suitable coverage, weather resistance, mounting strength, and simple controls. More cameras may create more blind spots when poorly positioned.
How to Choose the Right Automotive Camera for Your Vehicle?
Define your vehicle’s camera needs by matching the horizontal field of view to each driving scenario.
Wider fields of view are generally useful for low-speed parking, blind-spot monitoring, and surround-view coverage. Narrower fields of view provide greater image detail at longer distances for highway and forward safety applications. The values shown are representative engineering targets for comparing camera requirements.
Compare Automotive Camera Types and Their Core Functions
How to Choose the Right Automotive Camera for Your Vehicle?
Automotive cameras differ by position, viewing angle, and core function. A rear-view camera helps drivers judge parking lines, curbs, and nearby obstacles. A front-facing camera provides a wider road view and supports safer maneuvering in tight spaces. Side cameras reduce blind spots during lane changes. They are especially useful near motorcycles, bicycles, or poorly lit driveways. A surround-view system combines several cameras to create a bird’s-eye image. This setup improves parking awareness, but it needs careful calibration.
Cabin cameras serve a different purpose. They monitor passengers, rear seats, or driver attention, depending on the system design. Low-light performance also matters. A camera with infrared support can show clearer images inside a dark cabin, while a high-dynamic-range sensor handles bright sunlight and deep shadows. Check the lens angle, image resolution, weather resistance, and mounting position. A wide lens sees more area, but objects may look smaller and less accurate.
Tips: Test the camera at night. Examine glare near headlights. Clean the lens after dusty trips. Confirm that the display shows enough detail without distracting the driver. In my experience, choosing the highest resolution is not always best. Poor calibration can make an excellent camera feel unreliable. Measure the mounting space before purchase, because small fitting errors can affect the viewing angle.
Evaluate Image Quality, Viewing Range, and Night Performance
How to Choose the Right Automotive Camera for Your Vehicle?
Image quality should be judged in real driving conditions, not only showroom lighting. Look for sharp edges around bicycles, children, and narrow parking posts. A useful test shows a license plate clearly at several metres. However, resolution alone can mislead. A high-pixel sensor may still produce blurred images through a dirty lens or weak processing. Check colour accuracy, motion handling, and glare control. A washed-out screen at noon is not a minor inconvenience.
Viewing range must match the vehicle’s shape and daily use. According to NHTSA’s rear-visibility requirements, a camera should help reveal an area extending 20 feet behind the vehicle and 10 feet across. Wider coverage can reduce blind zones, but excessive fisheye distortion makes distance harder to judge. Test the camera beside a wall, then reverse slowly past a low object. Numbers can mislead. The display should preserve useful depth cues.
Night performance deserves stricter testing. NHTSA’s Traffic Safety Facts reports that roughly half of traffic fatalities occur at night, despite night travel representing about one-quarter of vehicle miles. Look for usable detail under streetlights, in rain, and near bright headlights. Infrared assistance may help, but it can flatten textures and hide colour differences. Night exposes weaknesses. A camera that looks impressive in a parking lot may fail on an unlit driveway. I would also inspect lens heating, water resistance, and screen delay, because a fraction of a second can change a tight manoeuvre. Perfect visibility is unrealistic, and that limitation should influence the final choice.
How to Choose the Right Automotive Camera for Your Vehicle? - Evaluate Image Quality, Viewing Range, and Night Performance
| Evaluation Dimension | Entry-Level Camera | Balanced Daily-Use Camera | Advanced Camera | What to Look For |
|---|---|---|---|---|
| Image Resolution | Approximately 480p–720p | Approximately 1080p | 1440p–4K, depending on application | Higher resolution can reveal more detail, but it also requires greater storage, processing power, and bandwidth. |
| Effective Detail | Adequate for close-range reversing | Clearer view of nearby vehicles, curbs, and obstacles | Better ability to distinguish signs, lane markings, and distant objects | Assess real-world sharpness rather than relying only on pixel count. Lens quality and image processing are equally important. |
| Horizontal Viewing Angle | About 90°–120° | About 120°–150° | About 150°–180° for wide-area coverage | A wider angle improves coverage but may increase edge distortion. Select the angle according to the mounting position and vehicle size. |
| Vertical Viewing Angle | About 60°–80° | About 70°–100° | About 90°–120° | A suitable vertical range helps show both nearby ground areas and higher obstacles without excessive image distortion. |
| Recommended Viewing Distance | Approximately 2–5 m | Approximately 3–10 m | Approximately 5–20 m, depending on lens and resolution | Choose the range based on whether the camera is for reversing, side monitoring, front-view assistance, or long-distance observation. |
| Dynamic Range | Basic exposure control | WDR or HDR support is commonly available | Advanced WDR/HDR with improved highlight and shadow handling | Wide dynamic range helps preserve details when bright headlights, sunlight, and dark areas appear in the same scene. |
| Low-Light Sensitivity | Usable with street lighting | Suitable for typical urban night driving | Better performance in dim roads and uneven lighting | Look for a large, sensitive image sensor, low image noise, and stable color reproduction at night. |
| Infrared Night Vision | Often unavailable or limited | Useful for dark parking areas and close-range monitoring | Integrated IR illumination or enhanced night imaging may be available | Infrared can improve visibility in darkness, but reflected IR may create glare on nearby surfaces or windows. |
| Frame Rate | About 25–30 frames per second | About 30 frames per second | 30–60 frames per second, depending on resolution | Higher frame rates provide smoother motion, but they can increase data usage and reduce available exposure time in low light. |
| Motion Blur Control | Limited | Acceptable for normal vehicle speeds | Improved shutter control and image processing | Test moving vehicles and pedestrians. A high frame rate alone does not eliminate blur if shutter speed is too slow. |
| Lens Distortion | More visible at wide angles | Moderate and often corrected electronically | Advanced correction with better edge preservation | Check whether straight lines remain reasonably straight, especially near the edges of the image. |
| Weather Resistance | Typically IP54–IP65 | Typically IP65–IP67 | Typically IP67 or higher for exterior installation | For exterior mounting, protection against dust and water is essential. Confirm that the rating applies to the complete installed camera assembly. |
| Operating Temperature | Approximately −20°C to 60°C | Approximately −30°C to 70°C | Approximately −40°C to 85°C | Select a temperature range suitable for the vehicle's climate and mounting location, especially near the engine or windshield. |
| Best Use Case | Basic rear-view or parking assistance | Daily driving, reversing, and general monitoring | ADAS support, fleet monitoring, multi-camera systems, and demanding night conditions | Match camera performance to the task. A more expensive camera is not automatically better for every vehicle. |
Check Compatibility, Installation Requirements, and Durability
Choosing an automotive camera begins with compatibility, not image quality. Check your vehicle’s voltage, camera connector, display input, and reverse signal. A camera may look advanced but remain useless without the correct interface. Confirm whether the system supports a direct video feed or needs an adapter. Also check the screen’s resolution and aspect ratio. Mismatched settings can create stretched images or a blank display.
Installation requirements deserve equal attention. Measure the mounting area before purchasing. A rear camera needs a clear view, while a front camera should avoid grilles, badges, and bright reflections. Route cables away from exhaust heat, sharp metal, and moving parts. Seal every drilled opening carefully. Moisture often causes failures before electronics do. I once underestimated cable length during an installation, creating unnecessary joins. That mistake made the final setup less reliable.
Durability matters in daily driving. Look for weather resistance, wide operating temperatures, vibration tolerance, and protection from ultraviolet exposure. An outdoor camera should handle rain, dust, road salt, and repeated washing. Check the published protection rating, but do not treat it as a guarantee. Poor mounting can still allow water inside. Test the camera at night, during rain, and after several drives. Confirm that the image stays stable when the vehicle vibrates. A clear picture in a showroom proves very little.
Choose Features, Storage Options, and Budget Considerations
Choosing an automotive camera starts with the driving problems you actually face. A wide viewing angle helps at busy intersections, while a sharper image can capture license plates in daylight. Night performance matters too. Look for balanced exposure, clear motion recording, and a stable mounting system.
In my installation experience, storage is often underestimated. A memory card may fill quickly when the camera records continuously. Loop recording can manage space, but important clips should be protected before they are overwritten. Some drivers prefer internal storage, while others need removable cards for easy transfer. Check capacity, recording quality, and card compatibility together.
Tips: Set a realistic budget before comparing features. Prioritize reliable video, heat resistance, and simple controls. A cheaper camera may become frustrating if its app disconnects or its footage is difficult to review. Test the viewing angle from the driver’s seat. Tiny blind spots matter. Also, confirm local rules about recording and privacy. I once focused too much on image resolution and ignored installation quality; the result looked good, but the camera shifted after several hot days. That was a useful reminder. More features do not always mean better protection.
